How to add SectionIndexTitles in SwiftUI
 @zntfdr
When SwiftUI launched, one of the missing pieces was the ability to control the offset of ScrollViews programmatically:
in Xcode 12 and iOS 14, we've gained ScrollViewReader, which addresses precisely this shortcoming.
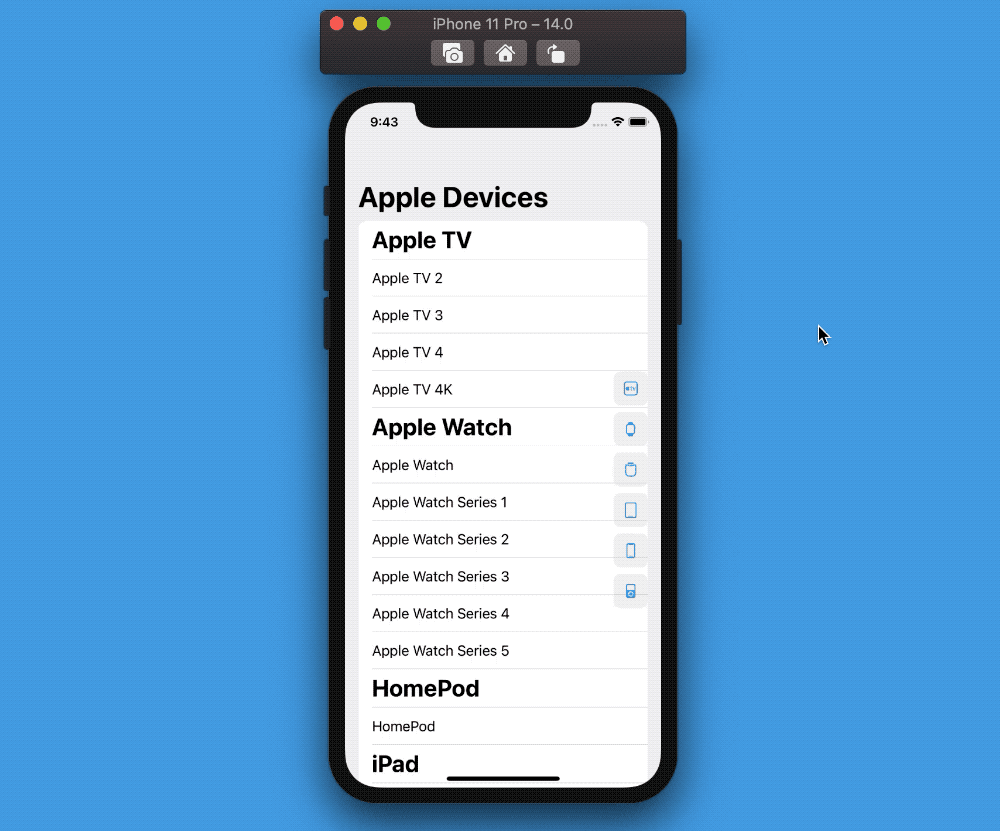
Another missing feature is the possibility to add sectionIndexTitles to Lists: this is the index list (for example, A through Z) placed on the trailing side of a table view, to jump to a specific section quickly.
In this article we're going to use ScrollViewReader and DragGesture and implement our SectionIndexTitles:
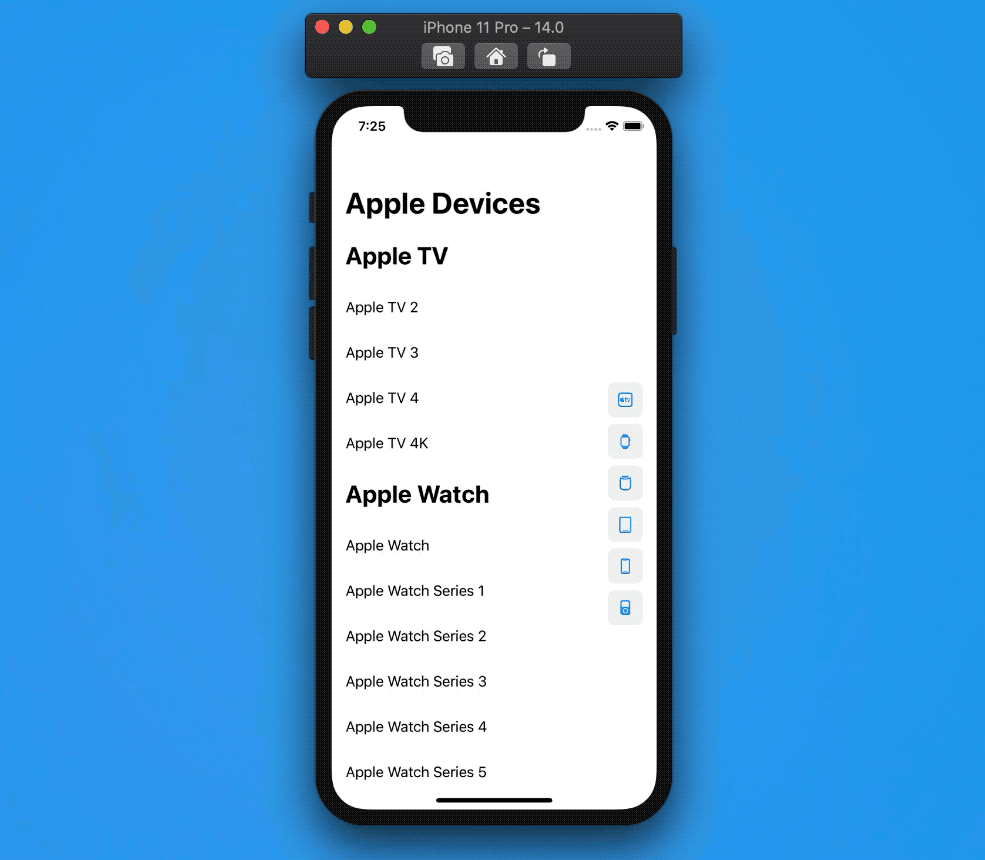
A lot is going on in this screen: let's build each component one by one.
The List
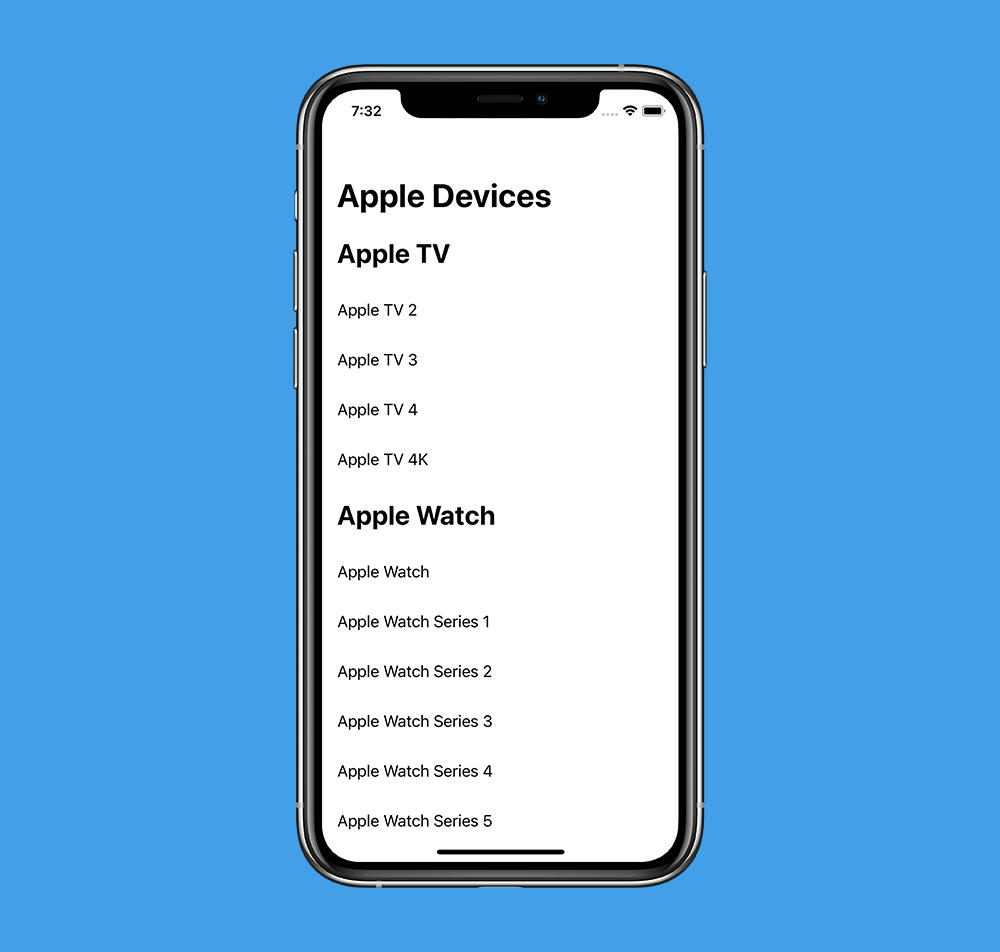
- we will use a
ScrollViewand ourScrollViewReader(an example withListis given at the end of the article). - while we use a
ScrollView, we still want to have a lazy loading of our UI elements; Therefore, we're going to use aLazyVstack. - lastly, the data comes in a dictionary, where the keys are the section headers, and the elements are the section content.
There are more efficient ways to display this data; however, it's not the focus of this article.
struct ContentView: View {
  let devices: [String: [String]]

  var body: some View {
    ScrollView {
      LazyVStack {
        devicesList
      }
    }
    .navigationBarTitle("Apple Devices")
  }

  var devicesList: some View {
    ForEach(devices.sorted(by: { (lhs, rhs) -> Bool in
      lhs.key < rhs.key
    }), id: \.key) { categoryName, devicesArray in
      Section(
        header: HeaderView(title: categoryName)
      ) {
        ForEach(devicesArray, id: \.self) { deviceName in
          RowView(text: deviceName)
        }
      }
    }
  }
}
Here we're also introducing a couple of helper views, RowView and HeaderView, to make the code more readable:
struct HeaderView: View {
  let title: String

  var body: some View {
    Text(title)
      .font(.title)
      .fontWeight(.bold)
      .padding()
      .frame(maxWidth: .infinity, alignment: .leading)
  }
}

struct RowView: View {
  let text: String

  var body: some View {
    Text(text)
      .padding()
      .frame(maxWidth: .infinity, alignment: .leading)
  }
}
Instead of wrapping
Textin anHStackand pushing it to the left with aSpacer, we're wrappingTextin a.framemodifier, set to take all the width given, and align its width content leading edge.
Section Index Titles
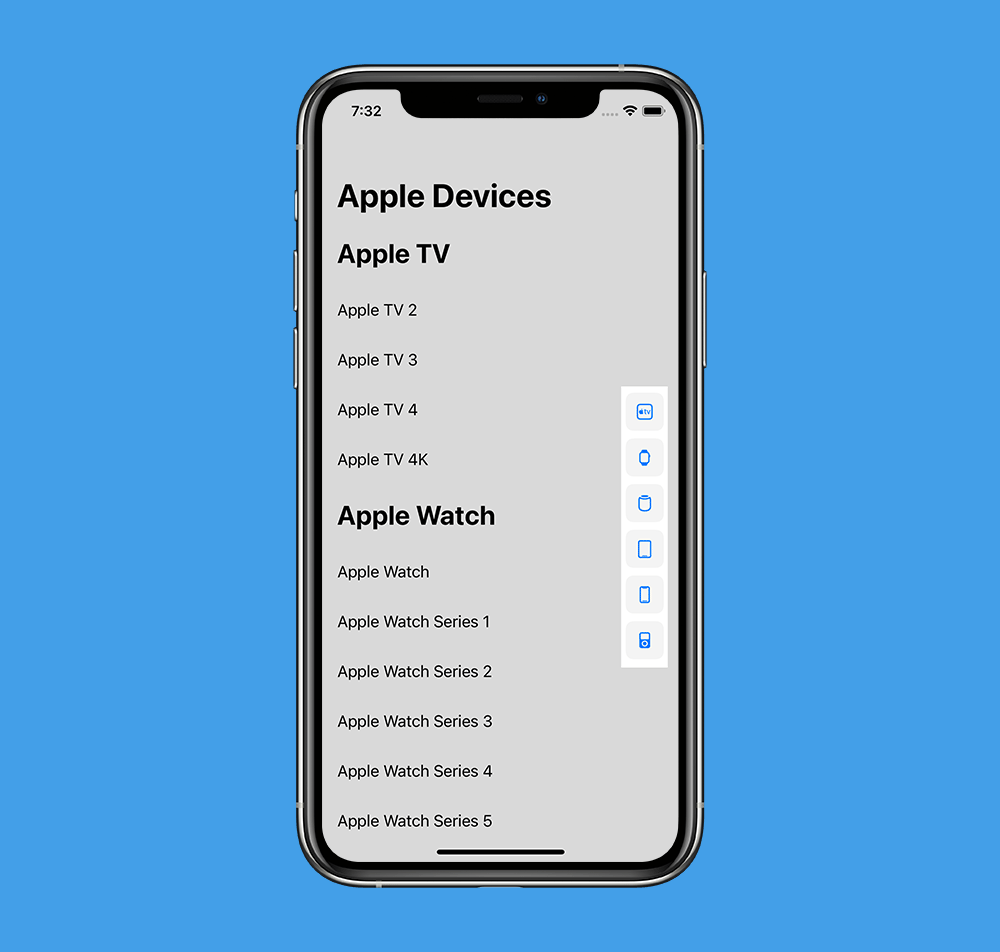
This is another standalone view. To make it more fun, let's use SF Symbols instead of text:
struct SectionIndexTitles: View {
  let titles: [String]

  var body: some View {
    VStack {
      ForEach(titles, id: \.self) { title in
        SectionIndexTitle(image: sfSymbol(for: title))
      }
    }
  }

  func sfSymbol(for deviceCategory: String) -> Image {
    let systemName: String
    switch deviceCategory {
    case "iPhone": systemName = "iphone"
    case "iPad": systemName = "ipad"
    case "iPod": systemName = "ipod"
    case "Apple TV": systemName = "appletv"
    case "Apple Watch": systemName = "applewatch"
    case "HomePod": systemName = "homepod"
    default: systemName = "xmark"
    }
    return Image(systemName: systemName)
  }
}
As before, I'm introducing a new view, SectionIndexTitle, to improve readability:
struct SectionIndexTitle: View {
  let image: Image

  var body: some View {
    RoundedRectangle(cornerRadius: 8, style: .continuous)
      .foregroundColor(Color.gray.opacity(0.1))
      .frame(width: 40, height: 40)
      .overlay(
        image
          .foregroundColor(.blue)
      )
  }
}
Putting it together
Now that we have both the list of devices and our SectionIndexTitles, we can put them together via an overlay:
struct ContentView: View {
  ...

  var body: some View {
    ScrollView {
      LazyVStack {
        devicesList
      }
    }
    .overlay(sectionIndexTitles)
    .navigationBarTitle("Apple Devices")
  }

  ...

  var sectionIndexTitles: some View {
    SectionIndexTitles(titles: devices.keys.sorted())
      .frame(maxWidth: .infinity, alignment: .trailing)
      .padding()
  }
}
We could have used a
ZStackas well; however, we want ourSectionIndexTitlesto be on top of ourScrollView, and avoid the titles expanding further than theScrollViewitself.
ScrollViewReader
With the UI in place, it's time to use the new ScrollViewReader component.
By wrapping our ScrollView into a ScrollViewReader, we're given a ScrollViewProxy instance, used to trigger a scroll programmatically:
this works by calling the scrollTo(_:) method on the instance and passing the id of the view we want to scroll to.
Note that the element we want to scroll to might not be loaded yet:
ScrollViewProxywill still work as expected.
struct ContentView: View {
  ...

  var body: some View {
    ScrollViewReader { proxy in
      ScrollView {
        LazyVStack {
          devicesList
        }
      }
      .overlay(sectionIndexTitles)
    }
    .navigationBarTitle("Apple Devices")
  }

  ...
}
ScrollViewProxy
In our first attempt, we can make each section title a button to jump to that section. To do so, we need to:
- pass the proxy to our
SectionIndexTitles - wrap each
SectionIndexTitleinto a button with a trigger to scroll to that section
struct SectionIndexTitles: View {
  let proxy: ScrollViewProxy
  let titles: [String]

  var body: some View {
    VStack {
      ForEach(titles, id: \.self) { title in
        Button {
          proxy.scrollTo(title)
        } label: {
          SectionIndexTitle(image: sfSymbol(for: title))
        }
      }
    }
  }

  ...
}
These two steps will already make our SectionIndexTitles work:
we don't need to add an explicit .id modifier in our ScrollView sections, because our devicesList is defined via a ForEach, where each view has an implicit identifier id: \.key (set in the ForEach), which is equal to our device categories.
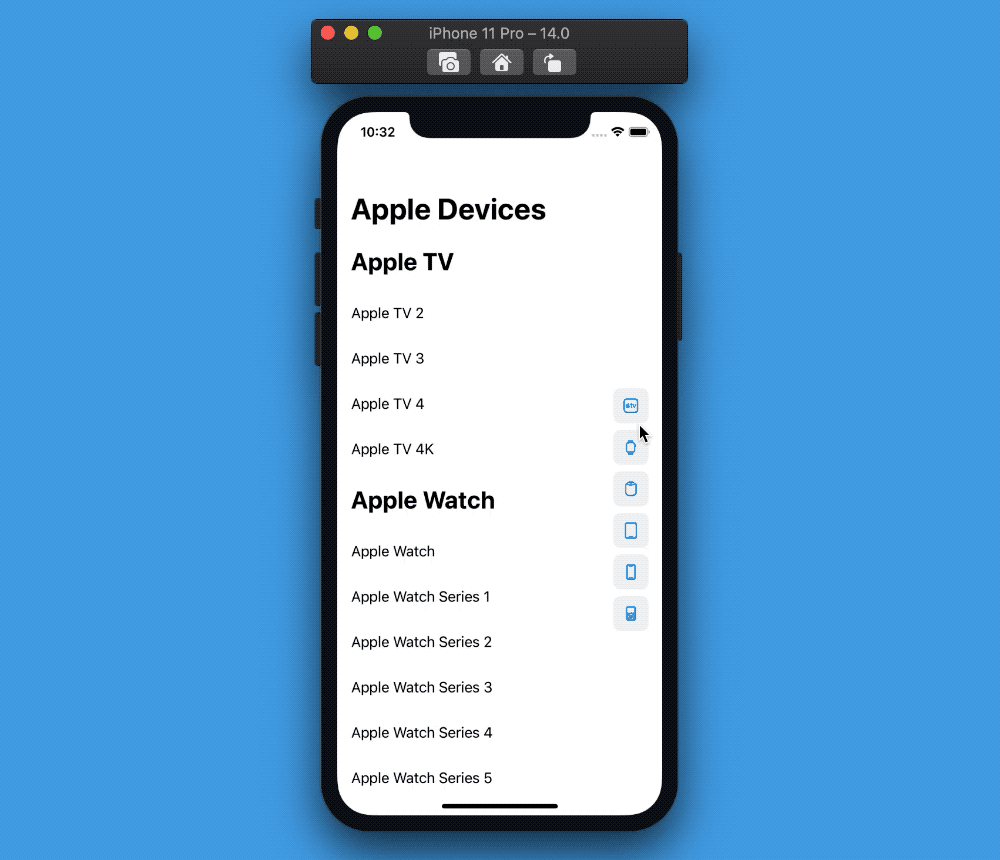
DragGesture
While our first attempt works fine, it doesn't precisely mimic UITableView's sectionIndexTitles:
the way sectionIndexTitles used to work is by dragging our finger on the titles, and only that will make the tableView scroll to the right section.
In this second attempt, we will add a drag gesture that spans the whole SectionIndexTitles view, and then trigger the right scrollTo action when the finger is over one of the index titles.
One way to do so is by:
- storing the global
dragLocationin a@GestureStatevariable - add a "drag location observer" to each section index title, which will trigger the
scrollToaction when the gesture is happening on that title.
struct SectionIndexTitles: View {
  let proxy: ScrollViewProxy
  let titles: [String]
  @GestureState private var dragLocation: CGPoint = .zero

  var body: some View {
    VStack {
      ForEach(titles, id: \.self) { title in
        SectionIndexTitle(image: sfSymbol(for: title))
          .background(dragObserver(title: title))
      }
    }
    .gesture(
      DragGesture(minimumDistance: 0, coordinateSpace: .global)
        .updating($dragLocation) { value, state, _ in
          state = value.location
        }
    )
  }

  func dragObserver(title: String) -> some View {
    GeometryReader { geometry in
      dragObserver(geometry: geometry, title: title)
    }
  }

  // This function is needed as view builders don't allow to have
  // pure logic in their body.
  private func dragObserver(geometry: GeometryProxy, title: String) -> some View {
    if geometry.frame(in: .global).contains(dragLocation) {
      // we need to dispatch to the main queue because we cannot access to the
      // `ScrollViewProxy` instance while the body is rendering
      DispatchQueue.main.async {
        proxy.scrollTo(title, anchor: .center)
      }
    }
    return Rectangle().fill(Color.clear)
  }

  ...
}
And with this, we we've finally achieved our goal! 🎉
The final gist can be found here.
List
Starting from Xcode 12 beta 3, all we've discussed here holds true for Lists as well:
The new gist can be found here.
Conclusions
SwiftUI doesn't offer everything that UIKit has. It probably never will. However, this shouldn't stop us from experimenting and come up with our SwiftUI solutions that will make our migration to SwiftUI easier.
I like the example above because now our SectionIndexTitles is just another SwiftUI view, making it incredibly easy to customize it (if SF Symbols were not already good enough for you) in ways that would not be possible in UIKit.
Thank you for reading, and stay tuned for more SwiftUI articles!