iOS 13 Large Content Viewer 🔎
 @zntfdr
When a user uses one of the Larger Text Accessibility Sizes, everything on the screen is huge.
Some UI elements, however, must stay small, even in these cases:
every inch of screen estate is incredibly precious.
Among such UI elements, for example, we have navigation bars, tab bars, toolbars, and the status bar:
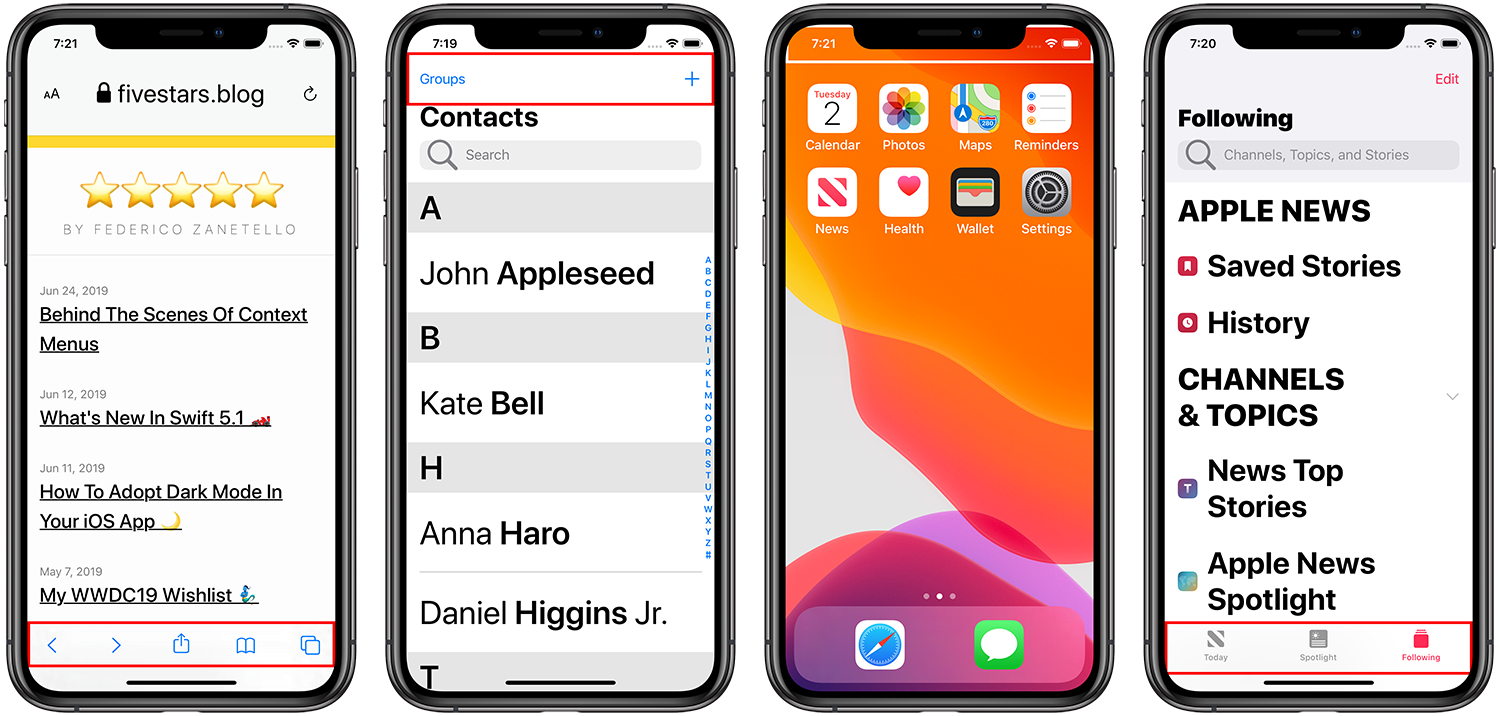
From left to right: Safari.app's Toolbar, Contacts.app's Navigation Bar, iOS Springboard's Status Bar, and News.app's Tab Bar.
Still, the problem remains:
users with large text sizes aren't able to read any of those elements. To overcome this, in iOS 11 Apple has introduced the Large Content Viewer:

The same apps as in the image above, now with Large Content Viewer: imagine a finger on the bars.
The Large Content Viewer
Tap and hold your finger on any bar element and, as long as you're using an accessibility text size, you'll get this big HUD, named Large Content Viewer, showing you both the element icon and title.
While all of this is awesome, any other UI element was left behind...until now.
UILargeContentViewerItem
Coming with iOS 13 is a new UIKit protocol named UILargeContentViewerItem, which lets any UI element describe what its Large Content Viewer should be.
The best part is that most of native UIKit elements (read: any UIView subclass) already conform to this protocol. Let's have a look at its requirements:
@available(iOS 13.0, *)
public protocol UILargeContentViewerItem: NSObjectProtocol {

    var showsLargeContentViewer: Bool { get }

    var largeContentTitle: String? { get }

    var largeContentImage: UIImage? { get }

    var scalesLargeContentImage: Bool { get }

    var largeContentImageInsets: UIEdgeInsets { get }
}
- showsLargeContentViewer Whether the UI element shows a Large Content Viewer. Return
falseto have the default behavior (and not show anything). - largeContentTitle This is the title shown in the large content viewer, optional.
- largeContentImage This is the image shown in the large content viewer, optional.
- scalesLargeContentImage Let iOS know whether the image should be scaled to a size appropriate for the Large Content Viewer, or show the image at its intrinsic size.
- largeContentImageInsets In case you need to use insets to center the image in the HUD, you can declare them with this property.
Disclaimer
As stated above, most of your UI already conforms to this protocol, however this doesn't mean that everything in our UI should have its own Large Content Viewer:
Apple really wants us to use Dynamic Type as much as possible, and only resort to the Large Content Viewer in very special UI elements (like the UIKit bars we've seen above).
With the disclaimer out of the way, let's see how we can finally display this HUD.
Adoption
First of all, we need to let UIKit know that our elements support Large Content Viewer:
we do so by setting our views showsLargeContentViewer property to true. While most of UIKit elements conform to the UILargeContentViewerItem protocol, most of them have this option turned off by default.
let myView = UIView()
// ... setup view here
myView.showsLargeContentViewer = true
There's no way to currently do this via storyboard. If you, too, feel this should be added, please write Apple a feedback.
Most views, like UILabels, UIImages, UIButtons, and more, already know what they should provide, therefore there's no need to set their largeContentTitle and largeContentImage properties.
Regardless, in case you do:
let myView = UIView()
// ... setup view here
myView.largeContentTitle = "Five Stars"
myView.largeContentImage = UIImage(systemName: "star.fill")
If you've never seen a
UIImage(systemName:)before, have a look at the Dark Mode article where I also talk about Apple's brand new System Symbols.
Lastly, we must add a new UILargeContentViewerInteraction to our views:
let myView = UIView()
// ... setup view here
myView.addInteraction(UILargeContentViewerInteraction())
Like we've seen in the Context Menu article, we don't need to retain these new interactions.
And that's it! Now we're fully supporting the new Large Content Viewer 🚀.
Debugging
There are essentially two ways in order to try out this new custom HUD: 1. run your app in a device with one of the accessibility sizes active 2. use the simulator and change the size with the new Environment Overrides button (more on this in the Dark Mode article).
I like the latter, especially since you can also change the simulator size preference by going in the settings.app and change the accessibility size there (no need to change it at every app launch via Environment Overrides).
And here's the result in my own apps:
Cool, isn't it? #A11y
Conclusions
Apple is putting an incredible amount of effort to make it easy for developers to make their app more accessible: this new Large Content Viewer is one of many examples of that.
For more information, watch the WWDC19 session Large Content Viewer- Ensuring Readability for Everyone and feel free to watch any other wwdc accessibility session available as well.
Lastly, if you, too, believe it would be very useful to let developers use this native HUD in other scenarios as well, without the need to use an external dependecy, I encourage you to write Apple a feedback like I did.
As always, if you're going to implement this accessibility feature, I'd love to see it!
Hit me up on Twitter with your work 🤗
Thank you for reading and stay tuned for more articles!